Build 2 Story Floor Plans Quickly and Easily with the Help of 3D Software

Create 2 Story Floor Plans easily
Try it virtually and show it in 4K
Be sure everything is flawless before launching works
Expedite the home planning process and have fun drafting realistic, 2 story floor plans with 3D technology. We dish out all the details you need to know to get started.
As an interior designer, you know that creating a house floor plan is one of the most important steps in the design process. It sets the foundation for everything that follows, from selecting furniture and decor to determining the flow of the space.
But with the traditional methods of pen and paper, creating a floor plan can be time-consuming and limit your creativity. That’s where 3D software comes in. 3D floor planners offer extensive tools and online catalogs with everything you could need to test out different styles and layouts to produce a replica of what you want.
You can create a detailed and accurate floor plan in a fraction of the time, allowing you to spend more time on the fun part of the design process – bringing your vision to life.
Whether you’re a seasoned interior designer or just starting out, 3D software is a must-have tool that can help you create attractive designs to impress clients. Read on to learn all about this innovative software and how easy it is to use for 2 story floor plans.

How to Customize a 2 Story Floor Plan with a 3D Home Designer?
Create a virtual 3D model of a 2 story floor plan in no time with these steps:
Step 1. Make the Floor Plan
- Option 1: Build a floor plan by connecting different room shapes by selecting “Add Room” from the toolbar and pick the shapes you want to add.
- Option 2: Choose the “Add Wall” tab to build the structure of the home. Click to draw the walls and connect them as you go.
- Option 3: Use a current floor plan that you have by clicking the “Ground Floor” tab and selecting the “Upload an Existing Floor Plan” button.
Step 2. Add Windows and Other Structural Features
- To outline where other structural features will go, navigate to the “Build” tab.
- Choose from the menu to add Exterior and Interior Doors, Windows, Staircases, and Technical Equipment, such as electrical or plumbing.
Step 3. Set the Measurements
- Input the precise measurements for the entire property when building the floor plan by using the Measurement tab.
- Click on any item to set the dimensions.
- Refer to this tab to check the corresponding measurements between two points at any time.
Step 4. Design and Decorate
- Assemble the interior design of the house by adding furniture and decorations under the “Furnish” and “Decorate” tabs.
- Pick the room that you want to furnish and select what you need from the menu, whether it’s dining tables, sinks, faucets, or accessories – it’s all available to use.
- Hit any of the drop-down options to view an assortment of products listed under that category to apply to your design.
- Use the cursor to select a specific spot to place the item and click to add it or reposition it.
Step 5. Explore New Ideas with Autofurnish
- View diverse designs and get fresh ideas with the Autofurnish feature that can create a fully furnished layout to spark inspiration.
- Right click to quickly Duplicate, Measure, Reuse, Add, or Delete items.
Step 6. Review Brands & Prices to Stay on Budget
- Review the brand name products used and the corresponding prices by clicking “Visit Store” on the top right corner of the screen to view the details to stay within your budget.
Step 7. Set the Scene and Time of Day
- To set the scene and show a complete spectrum of the design to clients, use the Studio Photo options to make changes to the background imagery, light intensity, and time of day.
Step 8. Take an Immersive Tour & Print Panoramic Photos
- Click on the Footprint tab on the bottom center of the screen and click to move throughout the floor plan to see it with a 360° viewpoint.
- Collaborate and share it so others can view and explore it with the same immersive experience.
- Print HD panoramic images to save in a portfolio, share or use for future reference.
3 Key Factors for Building 2 Story Home Plans to Keep Clients Happy
Developing the best layout for 2 story home plans involves a thorough review of factors, such as available square footage, zoning restrictions, the homeowner’s preferences, and lifestyle. Here’s a rundown on a few key points to remember to deliver the best results for your clients.
Determine the Homeowner’s Needs
It can be easy to get carried away with creative ideas, but when it comes to successful interior design, it must work for the client and suit their style.
Before developing a layout, make sure to understand what they need in terms of bedrooms, bathrooms, flexibility, privacy, and any other special requirements they may have. This information will help you create a floor plan and design that meets their expectations.
Plan for the Lot Size and Restrictions
Every property comes with certain challenges and limitations. But these can be overcome with some thoughtful creative strategies.
Consider the available space, along with the natural shape of the lot, and any zoning restrictions or setbacks that should be planned for in advance.

Optimize the Layout for Natural Light
Natural light is important for creating a bright and welcoming home. Think about the placement of windows and doors to maximize the amount of natural light that enters the home. For low-light areas, consider smart solutions like clerestory-style windows and skylights.
Example Floor Plans: 2 Story Modern Layouts
Explore the examples below for floor plans 2 story modern homes.
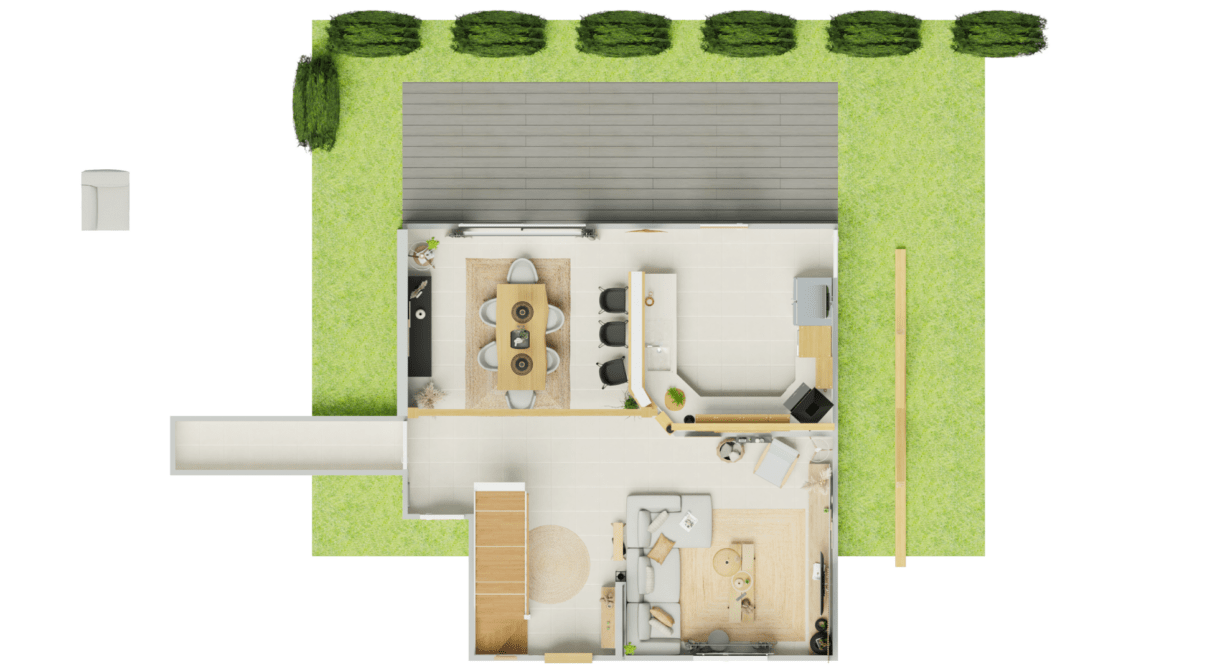
Modern: 3 Bed, 2 Bath with Covered Patio
This modern 2 story floor plan features an open concept living space on the first floor, with a large kitchen and dining area that flow seamlessly into the living room.
The second floor features three bedrooms, including a spacious master suite with a walk-in closet and luxurious en suite bathroom. This layout also includes a covered outdoor patio space, perfect for entertaining and maximizing smaller lots.
Contemporary: 4 Bed, 1.5 Bath, with Courtyard
For a luxurious and unique layout, consider a contemporary plan that features an L-shaped design that creates a private courtyard at the center of the home.
The first floor includes a large open living space, a home office, and a guest bedroom. The second floor features two additional bedrooms and a master suite with a private balcony overlooking the courtyard.

Minimalist: 5 Bed, 2.5 Bath, with Rooftop Terrace
This sleek 2 story floor plan features a minimalist design with clean lines and modern finishes. The first floor boasts an open concept with a large Great Room, a U-shaped kitchen, a home office, and a guest bed and bath.
The remaining three bedrooms are on the second level, along with a full bath, master bedroom and spa-inspired en suite with a private balcony. This also includes a covered outdoor living space and a large rooftop terrace.
HomeByMe is a user-friendly, cost-effective tool that offers a wide range of features that allow professionals and homeowners alike to create home designs quickly and easily.
With HomeByMe, you can illustrate ideas, play around with designs, and let clients visualize their dream home in 3D. Try it today for free and see how it can help you create beautiful and functional house plans in no time.


Create 2 Story Floor Plans easily
Try it virtually and show it in 4K
Be sure everything is flawless before launching works
Make flawless Design plans