Explore Kids Room Ideas with 3D Home Designers
Make any kids room designs quickly
Try it virtually and show it in 4K
Be sure everything is flawless
Embrace the power of 3D technology to unlock your creativity and transform kids’ rooms into enchanting havens that inspire joy, growth, and endless possibilities.
Kids’ rooms are more than just ordinary spaces – they are havens where imaginations soar, adventures unfold, and memories are formed. As an interior designer, you hold the key to transforming these rooms into captivating and functional environments that ignite creativity and nurture the young minds of children.
But how can you bring your design ideas to life with precision and clarity? The answer lies in harnessing the power of 3D home designers. Below, we delve into the realm of kid’s room design ideas, highlighting the significance of leveraging 3D tech to unlock the full potential of your designs.
We’ll also guide you through simple steps to seamlessly utilize these tools to illustrate designs in incredible detail.
Kid Room Ideas to Consider
When it comes to designing a kid’s room, there are endless possibilities to explore. The aim is to create a space that not only reflects the unique personality and interests of the child but also fosters comfort and growth. Here are some key considerations and inspiring kid room ideas to ignite your creativity:
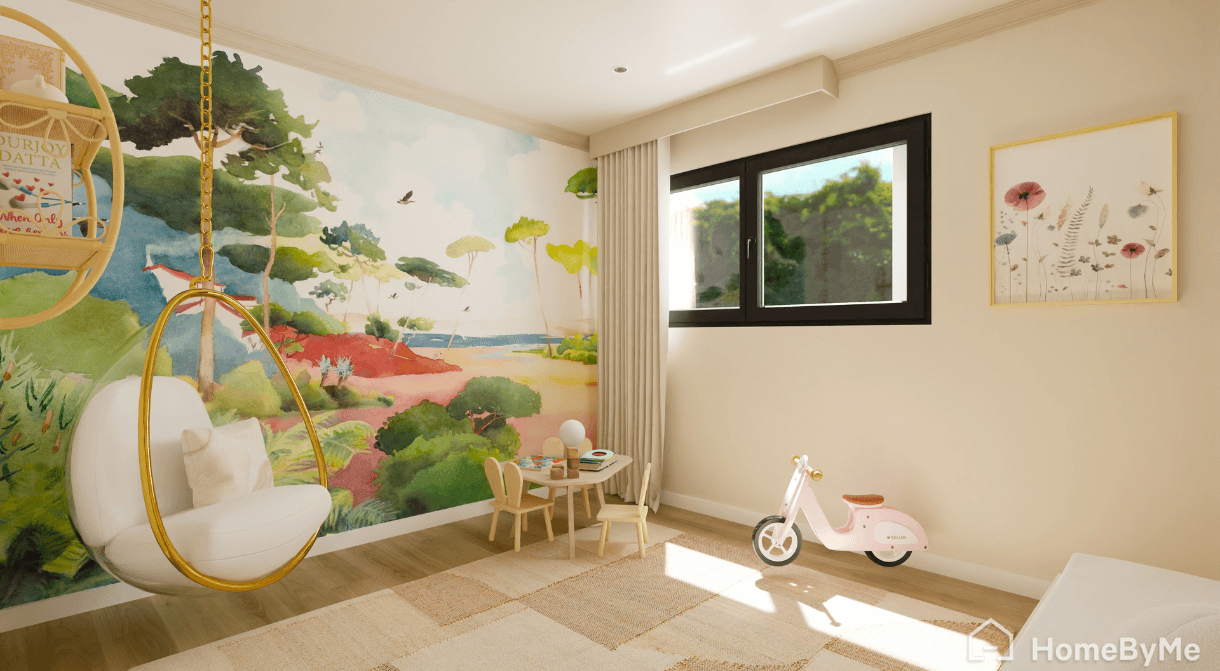
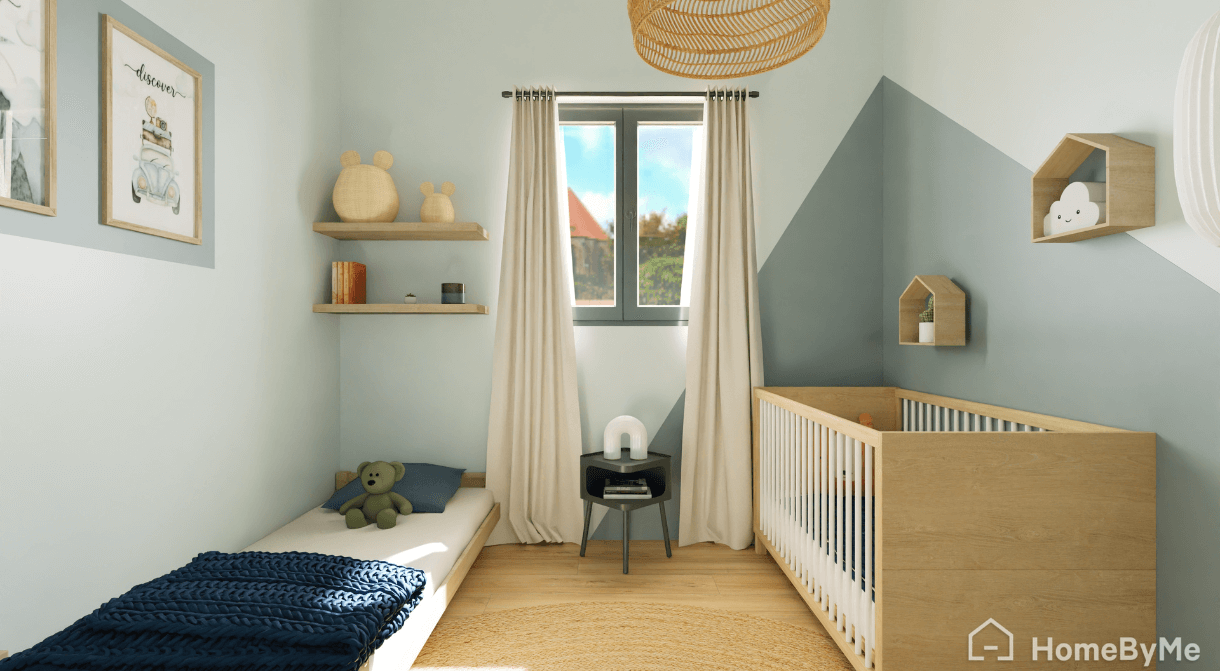
Color Palette and Themes
Choose a vibrant color palette that evokes joy and positivity. Incorporate themes that resonate with the child’s interests, such as animals, outer space, superheroes, or fairy tales. Let your imagination run wild as you create a visually captivating environment.
Functional Furniture
Optimize space by selecting furniture pieces that are both aesthetically pleasing and practical. Utilize multifunctional items like beds with built-in storage, desks with adjustable heights, and comfortable seating areas that can double as reading nooks or play corners.
Personalized Touches
Add personalized elements to make the room truly special. Incorporate customized wall decals, nameplates, or artwork that reflect the child’s identity and passions. These personal touches create a sense of ownership and enhance the room’s uniqueness.
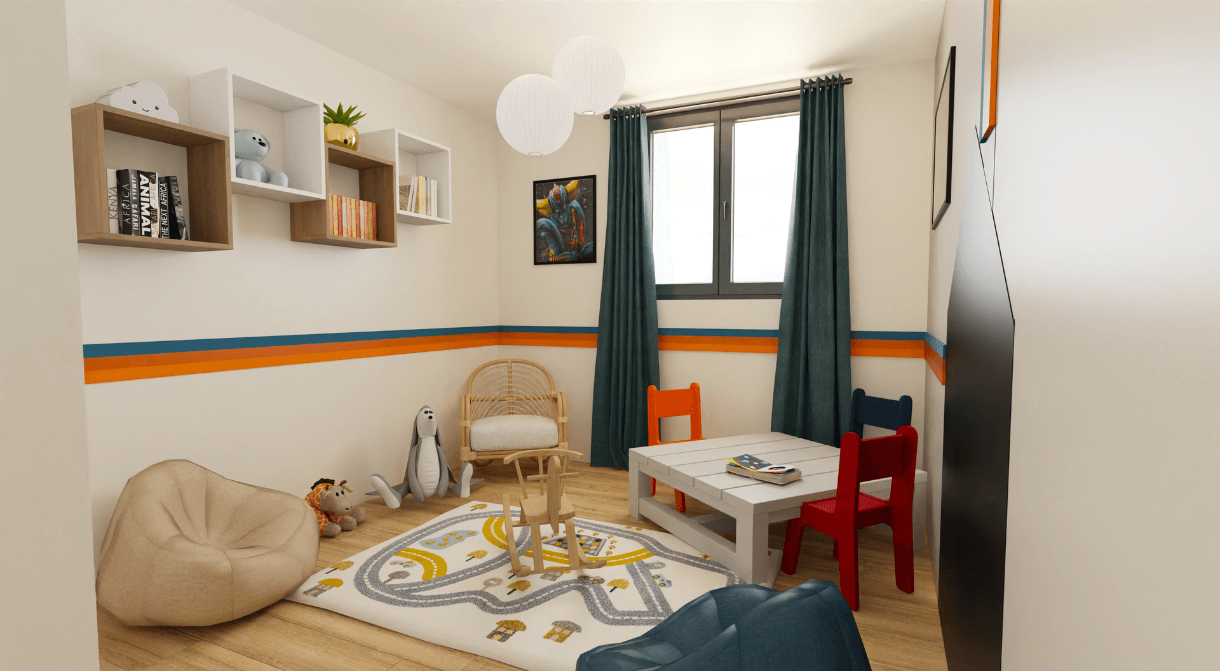
Example of awe-inspiring kid room designs...

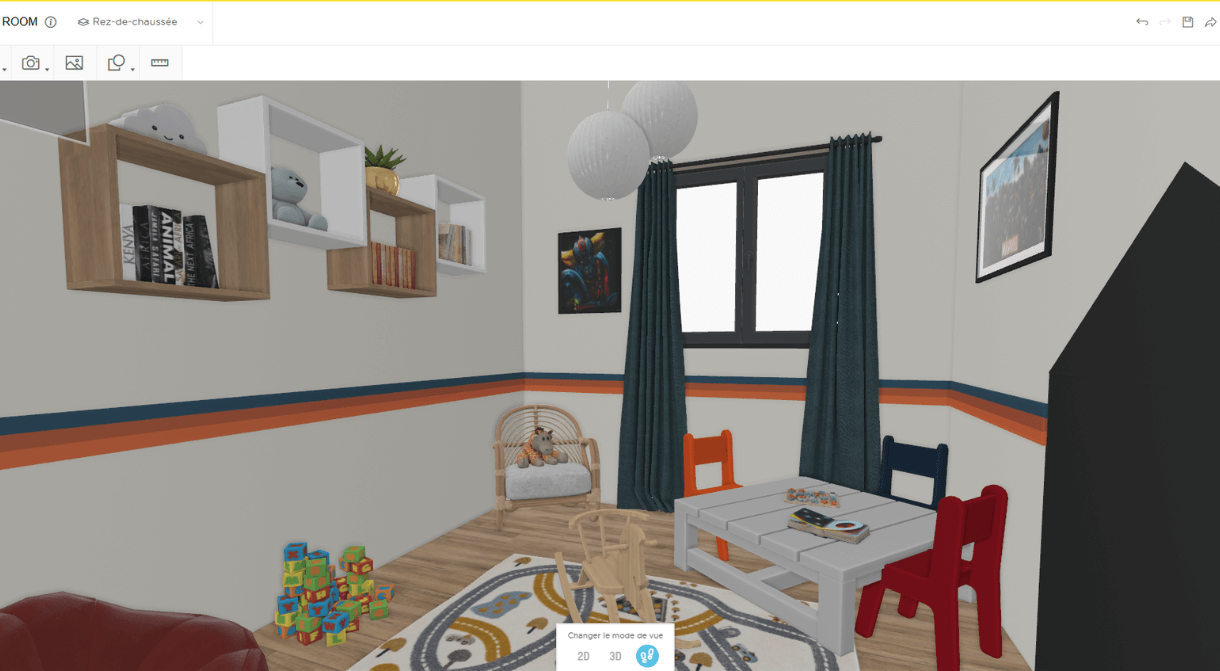
Kid’s Playroom Ideas that are Fun and Practical
A dedicated playroom offers a haven for children to explore, play, and unleash their boundless energy. It should be a space that encourages imagination, physical activity, and social interaction. Consider the following kid’s playroom ideas to create a vibrant and engaging playroom:
Zone Designation
Divide the playroom into different zones to accommodate various activities. Create areas for arts and crafts, reading, imaginative play, and physical activities like mini basketball hoops. Clearly defining these zones helps to organize the space and promotes focused play.
Storage Solutions
Ample storage is essential to keep the playroom organized and clutter-free. Incorporate shelving units, toy chests, and bins to neatly store toys, books, and art supplies. Make storage easily accessible and fun to encourage children to participate in tidying up.
Interactive Features
Introduce interactive elements to stimulate the senses and inspire exploration. Install sensory walls, chalkboards, or magnetic walls for creative expression, and interactive digital displays for educational play. These features create an immersive and captivating play experience.
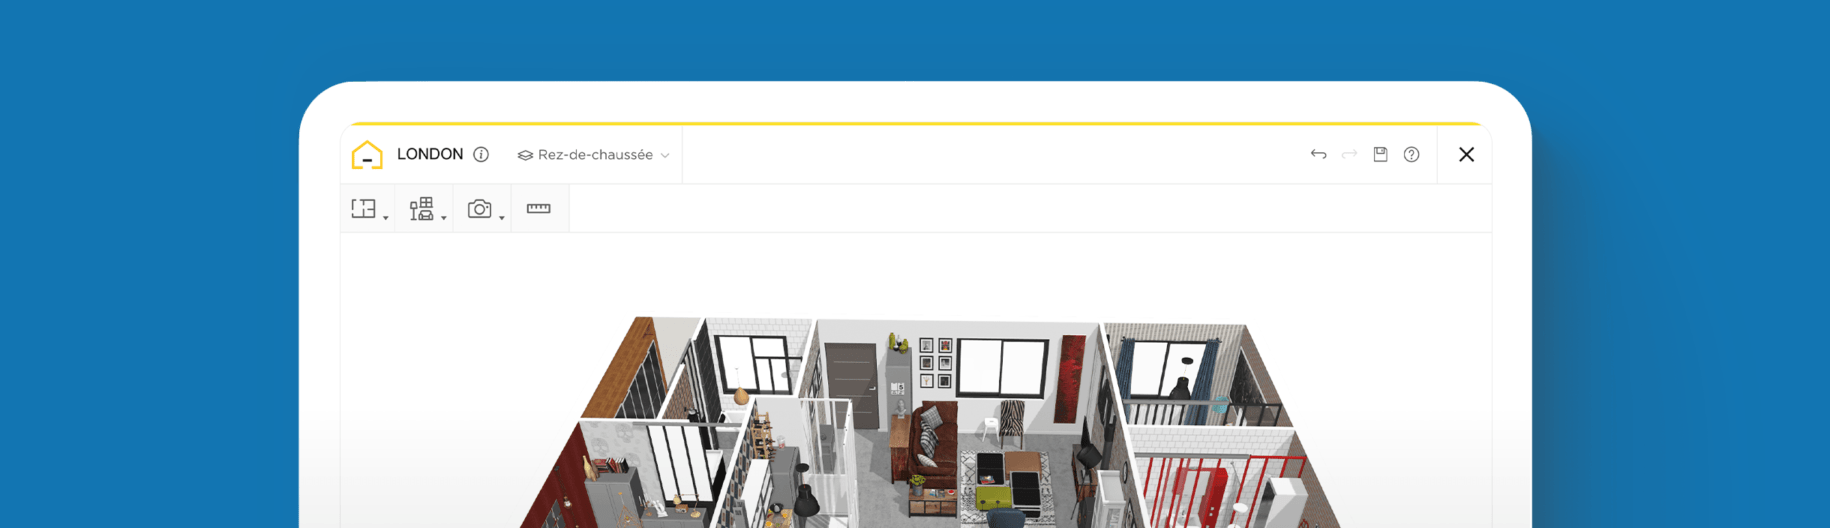
Using 3D Home Designers to Create Kid Room Designs
To create awe-inspiring kid room designs, interior designers can use the power of 3D floor design tools like HomeByMe. This user-friendly platform provides a comprehensive set of features to actualize your vision with remarkable precision.
Guide to use our solution for a perfect kid's room
1 Step 1. Access the interface and tools to get started
To access the HomeByMe interface, create a free account and follow the instructions to set up your first project.
Enter a name and project type, and choose whether you want to start adding walls or rooms to make the floor plan.
After choosing, you’ll see a grid where you will begin to form the layout and design.
2 Step 2. Setup the layout using the drag-and-drop features
Start by setting up the dimensions and layout of the room by dragging and dropping items into place.
Use the toolbar to find additional options to add doors and windows. Customize the room shape according to the specifications.
Use the measurement feature to make the layout precise.
3 Step 3. Add furniture and decor from HomeByMe’s extensive library and drag them into place
Explore the vast selection of furniture and decor within HomeByMe’s online library or Brand Corner.
Choose from a wide range of options, including beds, desks, chairs, storage units, rugs, and wall decorations.
Drag and drop any item into the virtual layout and arrange it to create the right aesthetic.
4 Step 4. Focus on customizations and detailing by adjusting different elements
Finalize your design by adjusting the colors, materials, and textures of furniture and decor.
Experiment with different combinations to achieve the ideal look and feel.
3D floor designers allow you to visualize how various materials and colors will interact within the space, helping you make informed design decisions.
5 Step 5. Tailor the lighting and ambiance based on the desired effect
Illuminate the virtual room by placing light fixtures strategically.
Test out different lighting options to create the desired ambiance, from warm and cozy to bright and energetic.
Adjust the intensity and direction of the lighting to achieve the perfect balance.
6 Step 6. View and explore the design using 3D rendering capabilities
Use the interactive rendering capabilities to visualize the design in a realistic manner.
Explore the room from different angles and perspectives. This feature allows you to experience the space as if you were physically present, helping you identify any potential design improvements or modifications.
7 Step 7. Allow others to view and provide comments or suggestions
HomeByMe enables easy sharing of design projects, enabling others to provide comments or suggestions.
This collaborative approach ensures that the final design aligns with everyone’s expectations and requirements.
8 Step 8. Utilize project management tools to generate a comprehensive plan for the project
Use the project management tools to keep track of materials, costs, and timelines.
Generate detailed reports and create a comprehensive plan to facilitate the implementation of your design.
This feature streamlines the workflow and helps ensure the smooth execution of your vision.

Whether it’s a captivating bedroom or an engaging playroom, the key to successful design lies in thoughtful planning and execution.
With the aid of 3D floor design tools like HomeByMe, interior designers can elevate their projects to new heights and ensure a truly remarkable space captures the essence of childhood wonder and imagination.


Make detailed floor plans with our 3D solution and create the perfect realistic 3D home.
Make any kids room designs quickly
Try it virtually and show it in 4K
Be sure everything is flawless
Make flawless Design plans