How to Master House Layout Plans using 3D Software?

Create House plans quickly
Try it virtually and show it in 4K
Be sure everything is flawless before launching works
With the ability to create detailed house layout plans with enhanced visualizations and photorealistic materials, 3D technology has become a key tool in the interior design and architectural industries.
As an architect or interior designer, you know how challenging it can be to create house designs that meet your clients’ lifestyles and preferences. Drawing house layout plans manually makes it difficult to imagine and portray all the components and proportions accurately. Fortunately, that’s where 3D software comes in.
It allows you to create a digital model of a home design and view it from any angle, giving you and your clients a realistic and detailed representation of ideas.
With advanced features and a user-friendly interface, 3D software can help novice designers and well-seasoned professionals to develop highly accurate designs that fulfill the multitude of expectations from homeowners.
Discover how this advanced technology can benefit your career, and how to begin using it today to produce stunning floor plans and home designs with minimal time and effort.

Why 3D Tech is the Key for a Successful House Plan Layout?
In today’s competitive market, interior designers and builders can benefit greatly by incorporating 3D technology into their work, particularly when it comes to creating a complex house plan layout.
The precision and accuracy can help professionals draft designs that fully capture their creative skills, while meeting their clients’ desires. It also saves time and reduces the need for costly revisions.
Additionally, 3D modeling allows designers to deliver realistic renderings, improving communication and collaboration with everyone involved in the project. Simply put, by utilizing 3D technology, professionals can improve the quality of their work and provide clients with exceptional service, which can set them apart in the industry.
How 3D Tech Can Benefit Any House Planning Layout?
Here’s how 3D home design software can benefit and speed up the process when it comes to delivering a successful and satisfactory house planning layout for clients.
Improved Accuracy and Precision
When using 3D software, you can create designs that fit any specifications required, including uneven terrain and large or narrow lots. With traditional design tools, this simply isn’t possible.
Beyond the powerful customizations, having the capability to visualize how different elements will work together can help guarantee that clients will be happy with the final design.
Increased Efficiency & Productivity
Using 3D software can also increase efficiency and productivity. With the capacity to create detailed models quickly and easily, you can reduce the time it takes to complete a project. This in turn, can allow you to take on more projects and increase your revenue.
Cost Savings
By creating accurate designs upfront, you can reduce the likelihood of errors and the need for expensive revisions during construction. This can help to keep costs under control and ensure that your project stays on budget.

Using 3D Tech to Make Floor Plans for a House
Now that you understand the benefits of using 3D software, let’s walk through the basic process on how to use it to make floor plans for a house:
Step 1. Set up your free account and sign in to start building a floor plan
The first step is to create your first project by setting up a free account in the floor planner and logging in.
From here, click on the “Create new project” tab to launch the dashboard and begin creating your floor plan.
Step 2. Build the floor plan by adding walls and rooms or upload an existing blueprint
Next, you’ll need to add walls to begin outlining the house design. To add each wall, click on the “Add Wall” tab in the toolbar and use the cursor to drag the walls around to connect them as needed.
To create the floor plan by room, choose the “Add Room” option in the menu and customize the shape and size to develop the layout.
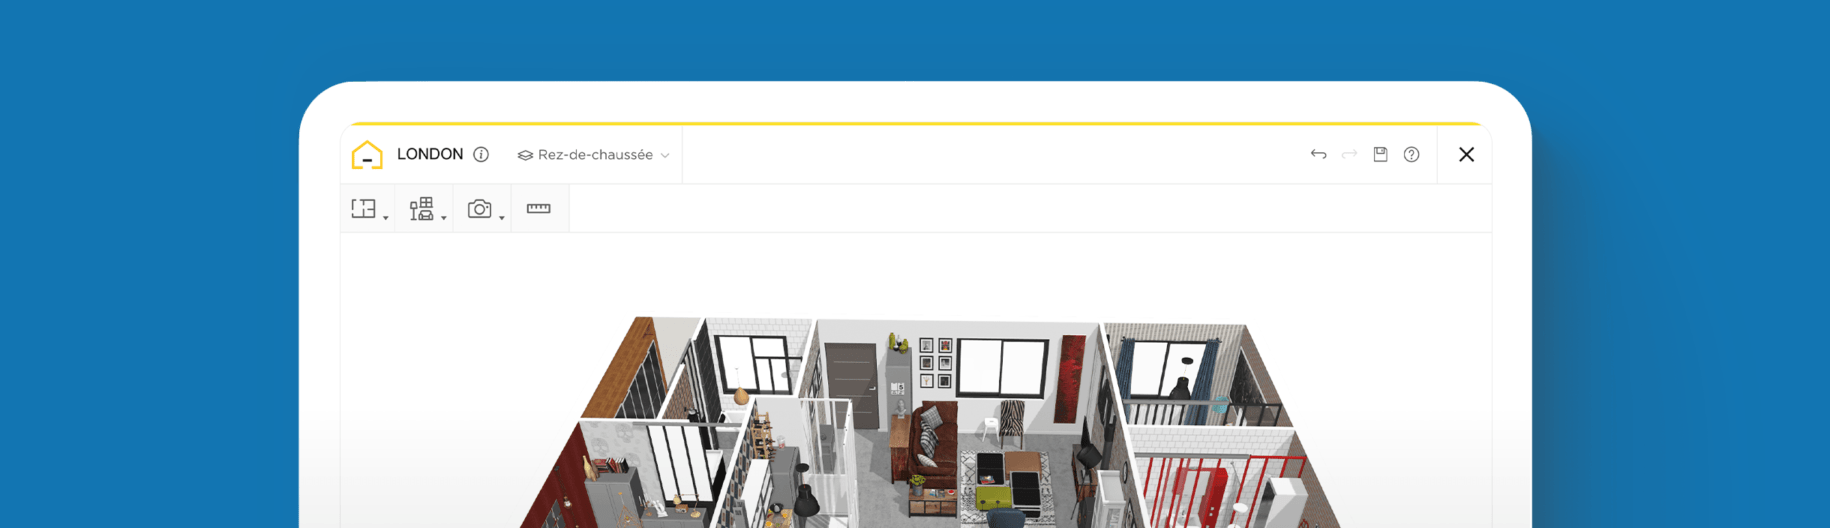
Already have a blueprint? Upload it into the planner by clicking on the “Ground floor” tab at the top of the toolbar and hit the “Upload existing floorplan” button.
Step 3. Add doors and windows and set the measurements
To complete the basic framework of the house, navigate to the menu to add doors and windows. You can choose the exact type, style, and size.
Click to reposition them exactly where you want.
Click on the measurements as you develop the floor plan or use the measurement tool in the toolbar to set the correct dimensions.
Step 4. Drag and drop appliances, furniture, and decor to create a detailed design
With the floor plan set, you can start to develop a design by choosing appliances, furniture, and decor from the online catalog in the 3D planner.
To do this, go to the “Furnish” or “Decorate” tabs to see all of the products and materials available. Choose any item that you want and click to drag it into the floor plan.
Alternate between 2D view mode to 3D mode to see it from different perspectives.
Test multiple concepts to compare different designs and ideas until you land on something that looks and feels just right.
Step 5. Try the Autofurnish feature to test out new ideas
Need some fresh ideas to kickstart your design? Try the Autofurnish feature in the HomeByMe 3D mobile planner.
This will produce a fully furnished floor plan for you by taking note of any items that you have liked and interacted with to generate a design that corresponds.
Step 6. Customize the light settings to capture the right mood
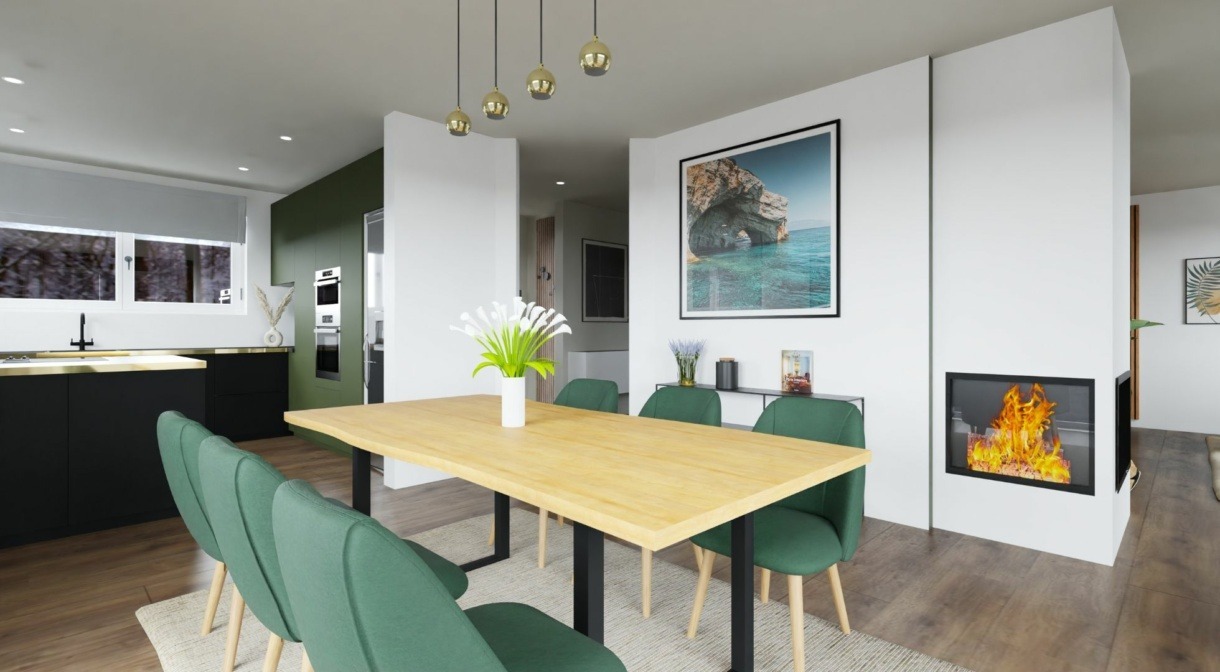
Being able to customize the light settings in your rendering is a major advantage of 3D software.
To do this, refer to the Studio Photo feature in the planner to tailor the ambient light to depict a specific time of day or mood to capture the full scope of the design so clients can get a more precise feel for their future home.
Step 7. Use the 3D virtual settings to view, analyze, and adjust
With the layout and design complete, use the 3D virtual settings to take a walkthrough of the house to view it from all angles and adjust any features.
You can see how the natural light enters each room, how the furniture placement affects the flow of the space, and how different finishes and materials will look together.
Step 8. Save the 3D renderings and get feedback from clients or colleagues
Get feedback from your team, contractors, and clients by sharing the design so they can also take a walkthrough and experience it from an in-depth vantage point.
Save, print high-res images, and use the renderings as a precise and detailed visual blueprint to help streamline the construction process once it begins.
3D home design technology like HomeByMe has transformed the interior design industry, becoming an invaluable tool for experts in the field.
The ability to create accurate models can drastically reduce the likelihood of mistakes and ultimately, save time and costs during the construction process. With the enhanced visualization and communication offered by HomeByMe, designers can collaborate more effectively, ensuring that they can create homes that keep their clients happy.
Try it out today!


Create House plans quickly
Try it virtually and show it in 4K
Be sure everything is flawless before launching works
Make flawless Design plans