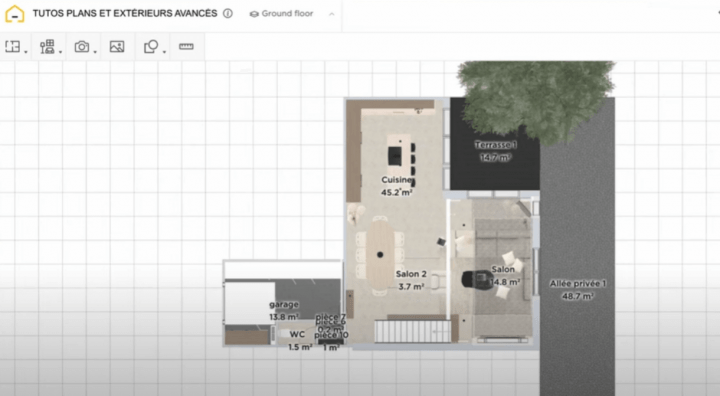
Discover how to create a clear, professional 2D floor plan with HomeByMe in this 2025 tutorial.
Creating a 2D floor plan for your home or apartment might seem technical at first. With HomeByMe, this step becomes intuitive, fast, and accessible to everyone—even those with no background in architecture. Thanks to the new advanced 2D plan feature, you can now produce a clean, attractive, and practical layout that’s ready for printing, sharing, or professional use.
Once you open your project, simply click on the camera icon at the top of the screen. Then, select the “2D Plan” tab to enter the dedicated plan interface.
One of the first updates you’ll notice is the automatic display of a title block. This is where the technical information of your plan is clearly organized. It includes the name of your project, the current floor level, the unit of measurement (metric or imperial), and of course, the scale of the plan. You’ll also find the total area of each room on that floor, along with any exterior spaces like balconies or terraces.
In the bottom-left corner, you’ll see a settings panel that allows you to customize what is shown on the plan. You can choose whether or not to display furniture, flooring, room names, surface areas, and any custom annotations you’ve added. These options are activated via simple toggles and can be selected all at once or individually.

HomeByMe also lets you control the display of details room by room. A list of all rooms on the floor appears, and for each one, you can choose whether or not to show its dimensions. This makes it easier to keep your layout clean or to highlight key areas.
One of the new 2025 features is the automatic display of window dimensions, saving you time and improving precision. You can also choose whether to show or hide the legend, change the background color between black and gray, and define the plan orientation (North, South, East, or West). There’s even an option to adjust the plan’s scale to suit your specific needs.
Once you’ve selected all the information you want to display, you can take a screenshot to capture your 2D floor plan. This can be done for each floor of your project—just switch between levels and repeat the same steps.
In just a few minutes, you’ll have a clean, structured plan ready for presentations or professional documentation. Whether you’re a homeowner or a design professional, this feature allows you to produce a plan that is both technical and visually polished, with no unnecessary complexity. If you’re looking to design a house floor plan quickly and easily, HomeByMe is the ideal solution.

