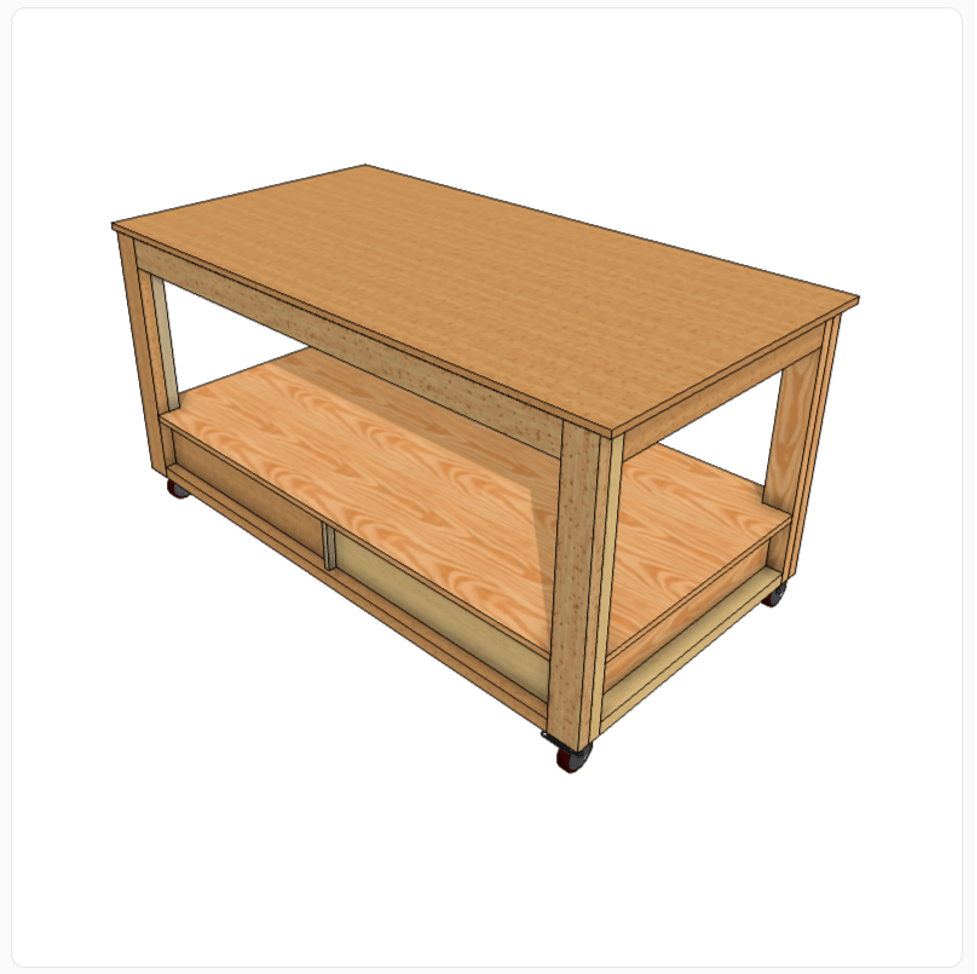
DIY Plans to build a workbench with drawers

Design your perfect project in 3D with MakeByMe
Try it in your virtual home using HomeByMe
Use MakeByMe plans to turn your design into a reality
Check out the plans below and build your own workbench today!
Description:
This mobile workbench has plenty of work surface, plus storage and shelving underneath. A practical solution for both small and large spaces for working in your workshop or garage.
For more ideas you can also browse the Community Content to inspire your next DIY project.

Materials List:
- (7) 2x4x8 boards
- (3) sheets ¾” plywood
- (1) sheet ¼” plywood
- Wood Glue
- 2 ½” pocket hole screws
- 1 ¼” pocket hole screws
- 2 ½” wood screws
- 1 ¼” wood screws
- Staples OR Brad nails
- (4) 16” ball bearing drawer slides
- (4) caster wheels
Tools List:
- Circular Saw & Cutting Guides
- Drill/Driver
- Miter Saw
- Jig Saw
- Pocket Hole Jig
- Stapler or Brad Nailer
Cut List:
- 2×4 boards
- (4) 62” long
- (12) 31” long
- ¾” plywood
- (1) 38” x 71”
- (1) 37” x 69”
- (1) 6 ½” x 63 ½”
- (4) 6 ¼” x 30 3/8”
- (8) 4 ½” x 16”
- (8) 4 ½” x 28 1/8”
- (2) 31” x 6 ½”
- (2) 17 13/16” x 6 ½”
- ¼” plywood
- (4) 16” x 29 5/8”

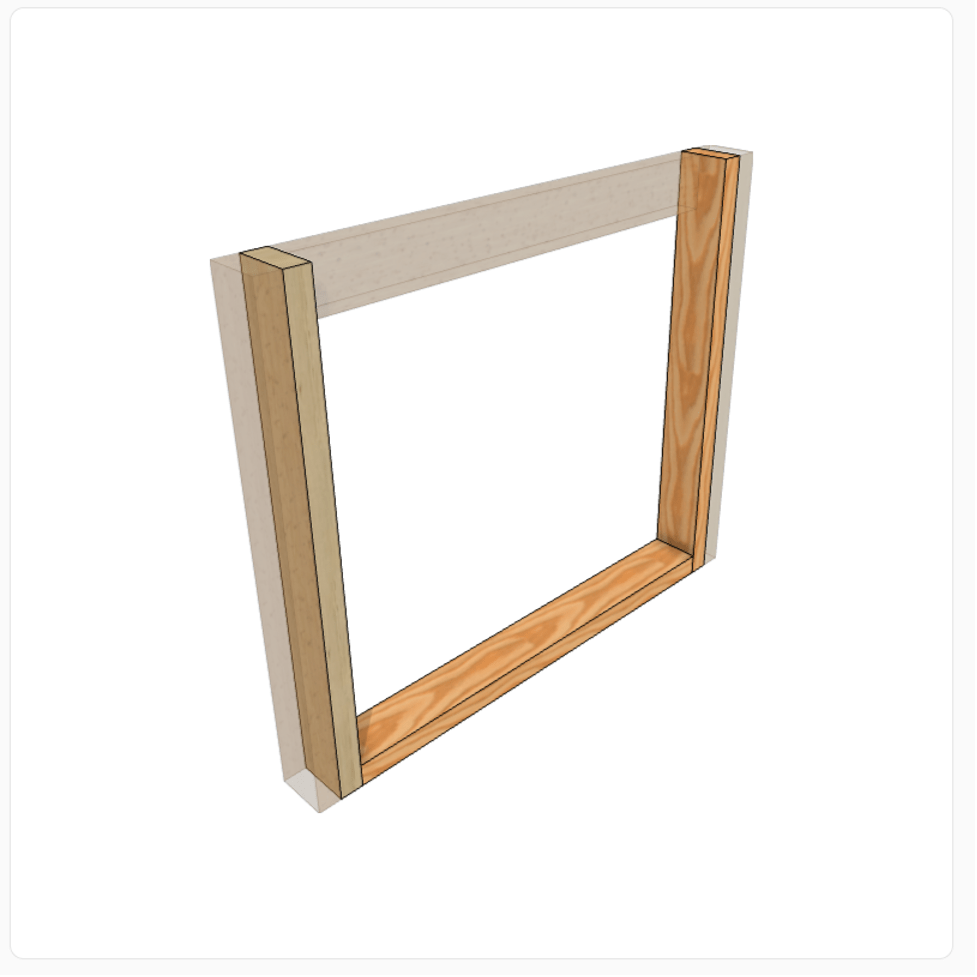
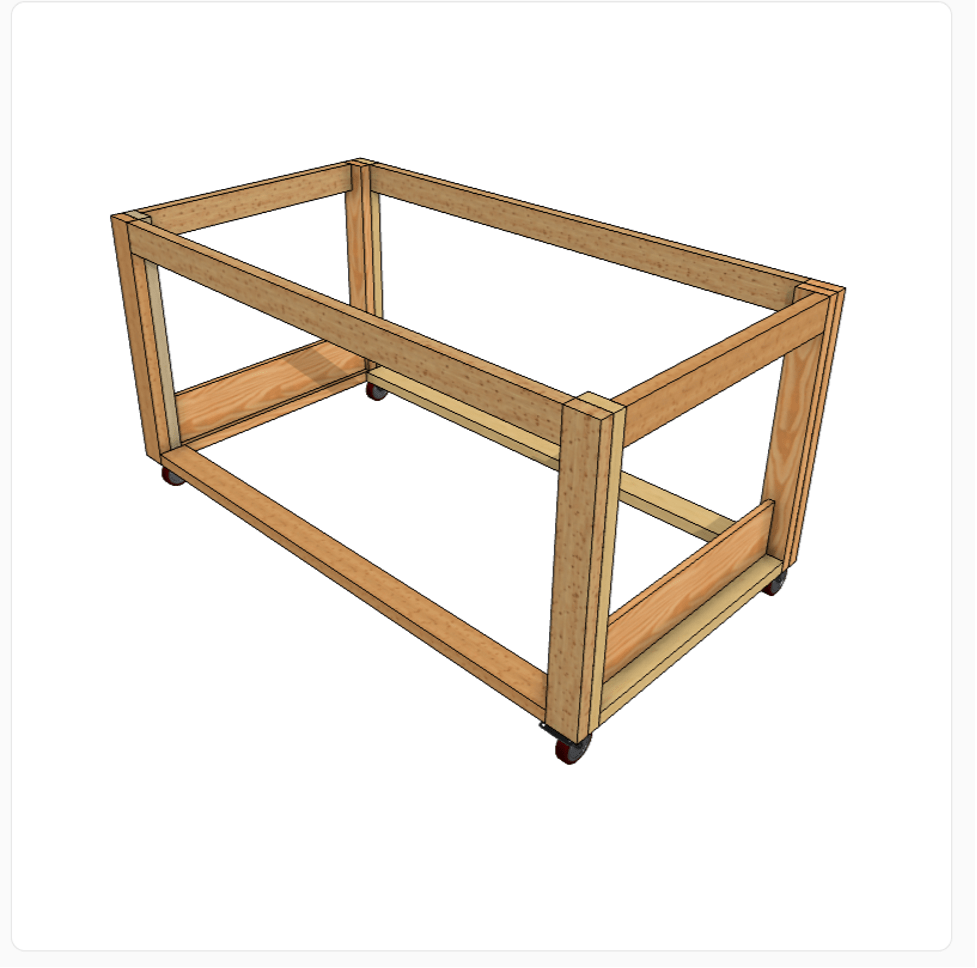
Step 1: Assemble Workbench Legs
Cut (8) 2x4s to 31″ long. Attach these in pairs using wood glue and 2 1/2″ wood screws to make 4 legs.

Step 2: Attach Top Side Framing
Cut a piece of 2×4 to 31” long and drill 1 ½” pocket holes into each end. Secure between two of the legs from step 1 flush to the outside using 2 ½” pocket hole screws like shown.

Step 3: Add Bottom Side Framing
Cut a piece of 2×4 to 31” long and drill 1 ½” pocket holes into the ends of each. Attach between the two legs at the bottom (note that it’s turned on its side, not running vertically) using 2 ½” pocket hole screws.
Repeat step 2 & 3 to create two identical side frames for this workbench.
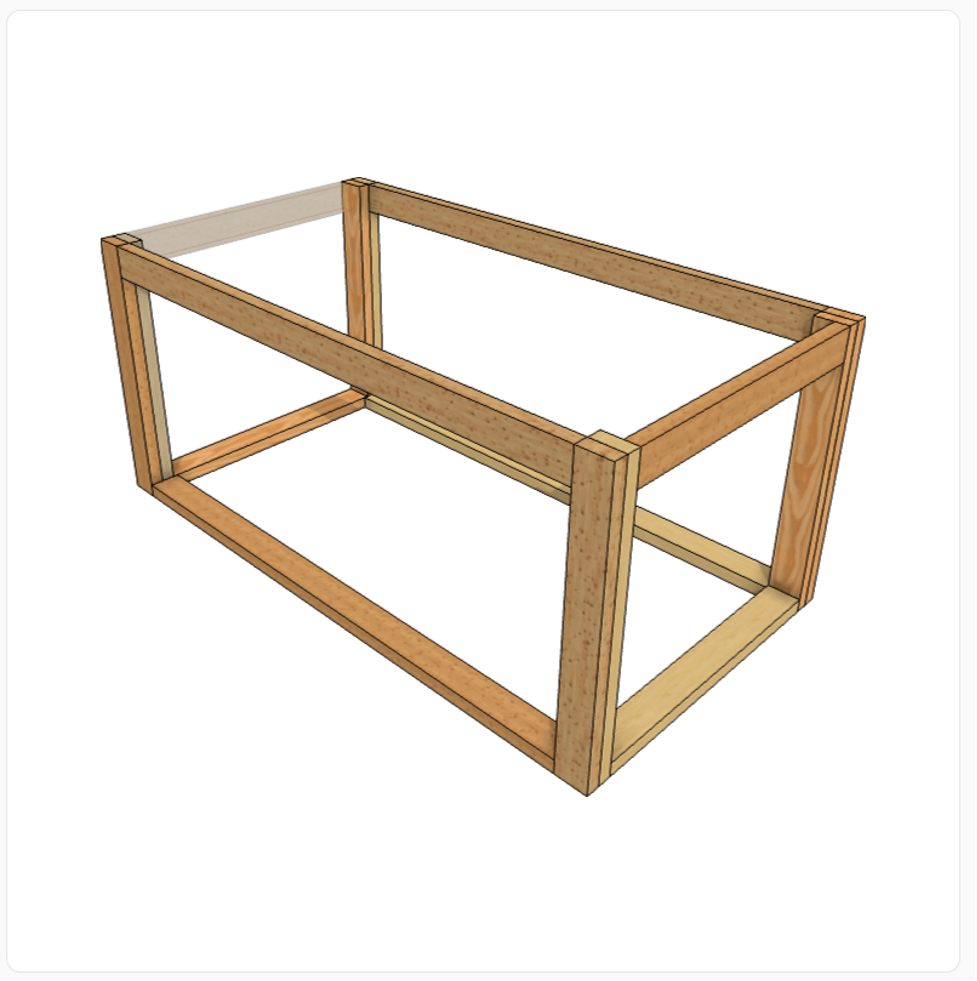
Step 4: Assemble Workbench Frame
Cut 4 pieces of 2×4 to 62” long and drill 1 ½” pocket holes into the ends of each. Attach between the two side frames from step 3 using 2 ½” pocket hole screws. Note that the top 2x4s run vertically and the bottom 2x4s are turned on their sides.
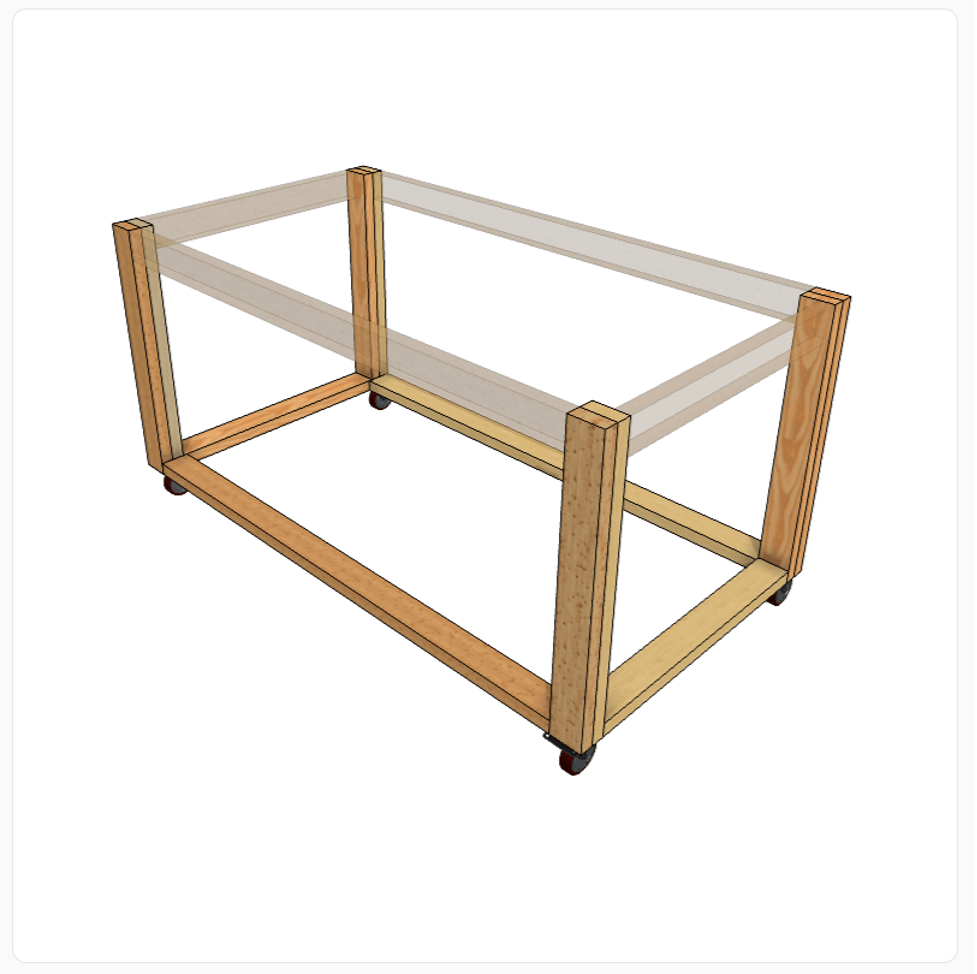
Step 5: Attach Caster Wheels
Flip the workbench frame upside down and install heavy duty caster wheels on each leg using 1 ¼” wood screws with washers
Step 6: Add Side Panels
Cut two pieces of ¾” plywood to 6 ½” x 31” and drill ¾” pocket holes into both short sides and along the bottom edge. Install into the bottom of the side panels like shown so that they are ¾” from the INSIDE of the framing using 1 ¼” pocket hole screws.
Step 7: Add Drawer Framing
Cut a piece of ¾” plywood to 6 ½” x 63 ½” long. Drill ¾” pocket holes into the ends. Install between the side panels from step 6 so that it is centered front to back using 1 ¼” pocket hole screws.
Cut 2 pieces of ¾” plywood to 6 ½” x 17 13/16” and drill ¾” pocket holes into one short end. Drill another ¾” pocket hole on the bottom edge toward the other short end.
Center these pieces along the 63 ½” piece and install to it using 1 ¼” pocket hole screws. Secure the other end with another 1 ¼” pocket hole screw to the bottom 2×4 framing.

Step 8: Assemble Drawer Boxes
Assemble 4 identical drawer boxes using ¾” plywood so that the overall size of each drawer is 4 ½” tall x 16” deep x 30 5/8” wide. Attach pieces using ¾” pocket holes and 1 ¼” pocket hole screws.
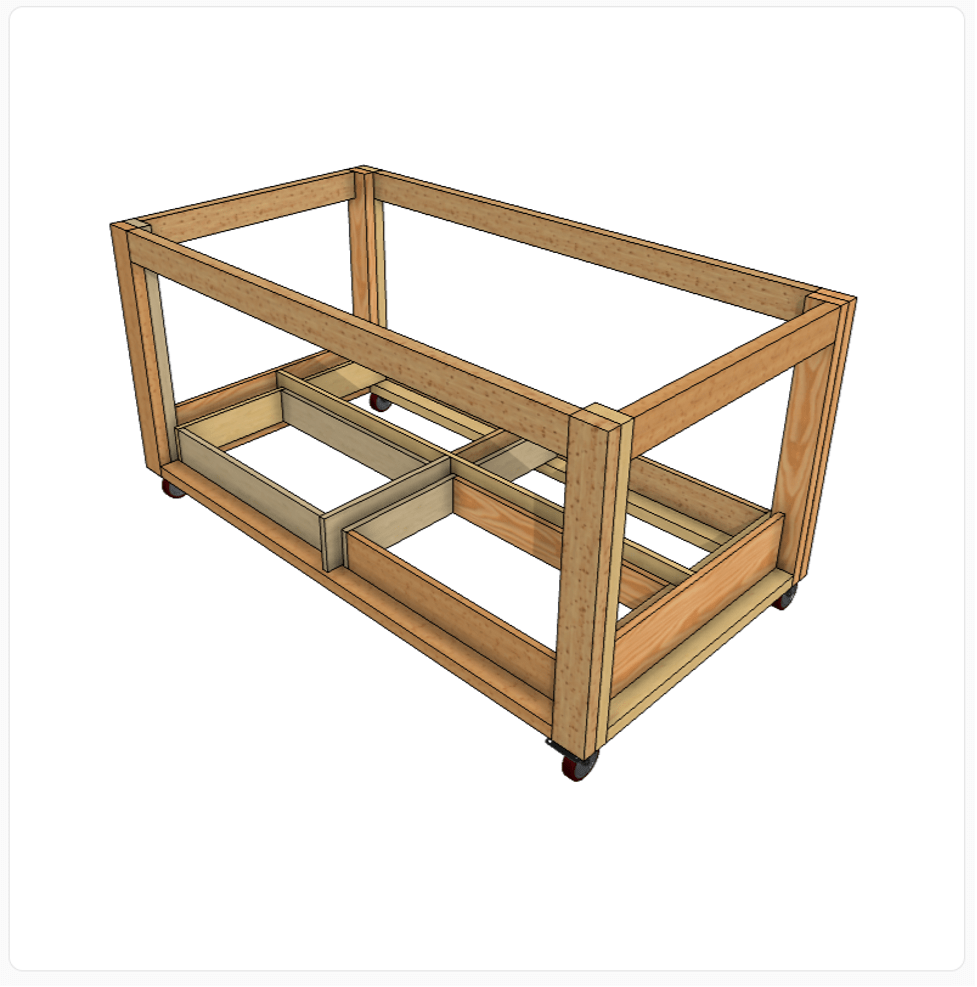
Step 9: Add Drawer Bottoms
Cut four pieces of ¼” plywood to fit over the bottom of each drawer box. Apply wood glue to the bottom of each drawer and secure these panels on the bottom using staples or brad nails.
Step 10: Install Drawers
Install 4 pair of 16” ball bearing drawer slides into the workbench—one in each of the four bottom sections. Install the drawer boxes from step 9 onto these slides so that they are 1 ½” inset from the outside edge.
NOTE: You’ll need to install some scrap ¾” plywood spacer blocks onto the side panels before installing the slides since it’s not flush to the inside edge.
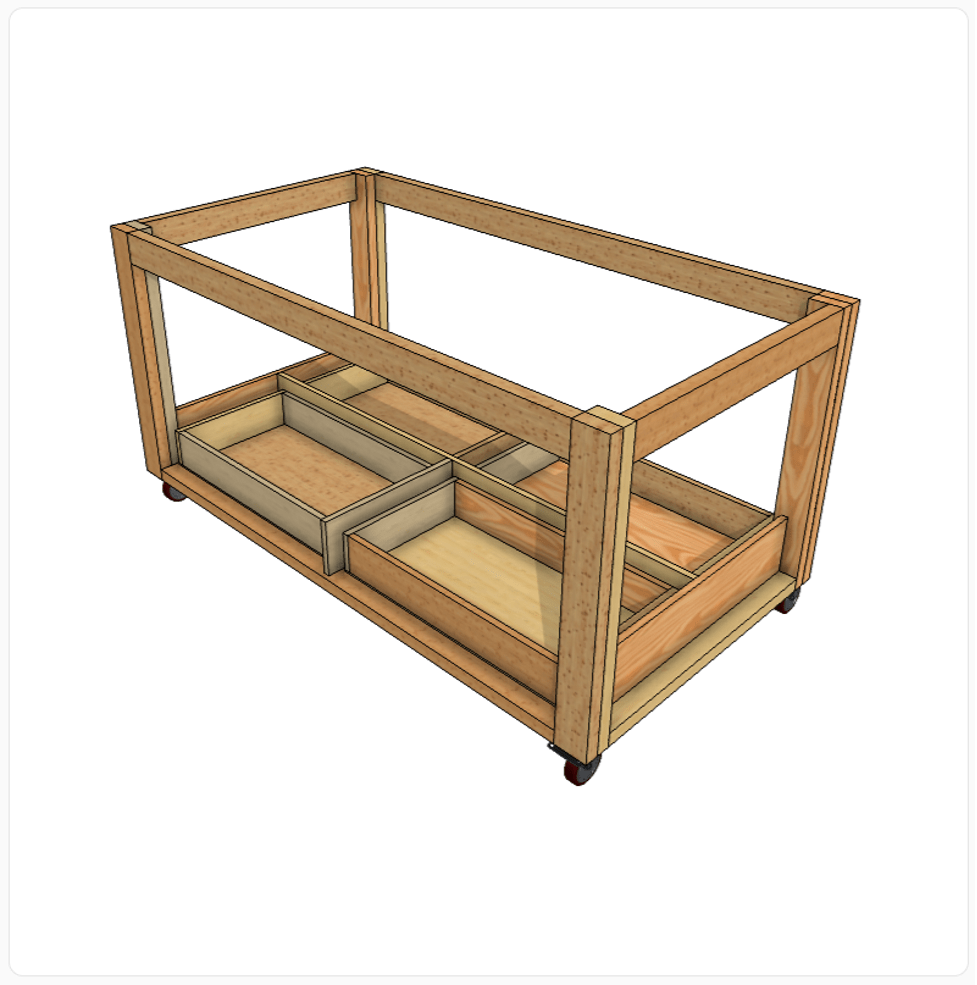
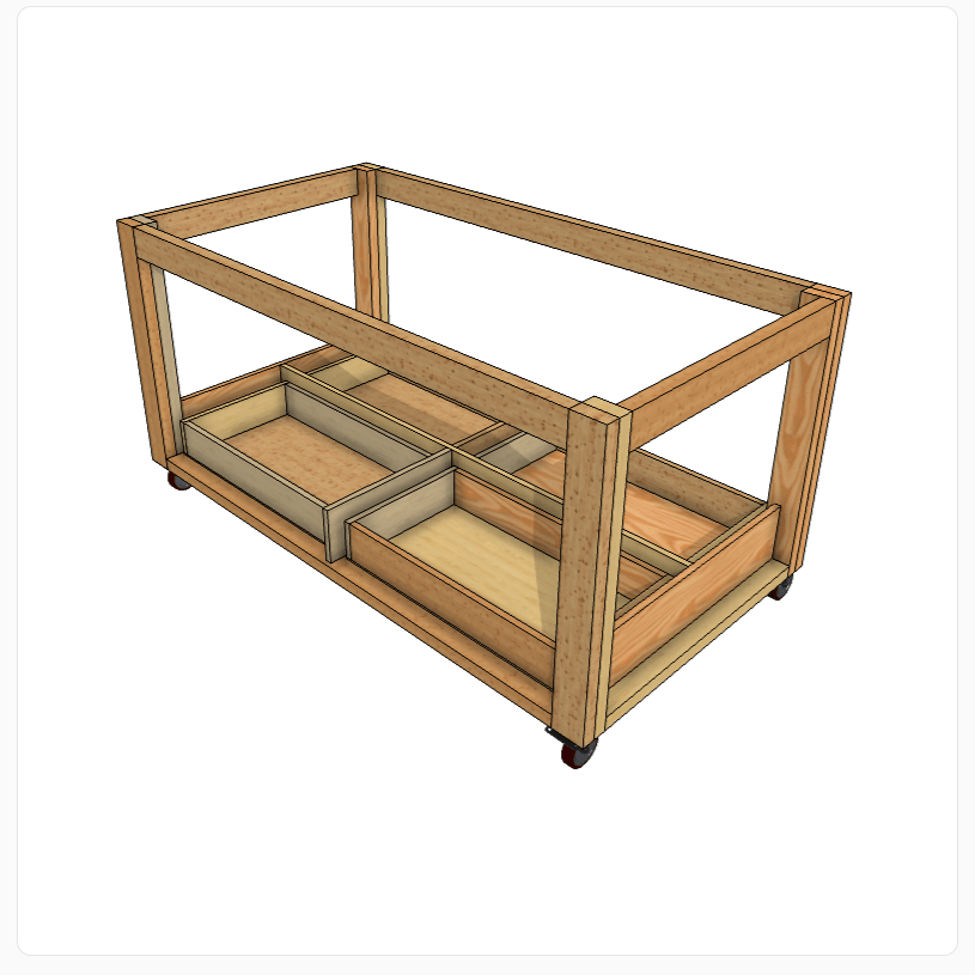
Step 11: Install Drawer Fronts
Cut four pieces of ¾” plywood to 6 ¼” x 30 3/8” for the drawer fronts. Install these onto each drawer using 1 ¼” wood screws through the inside of the drawer box. Make sure to leave 1/8” gap around all sides of the drawer front and surrounding framing.
Add drawer pulls/knobs as desired.

Step 12: Install Middle Shelf
Cut a ¾” plywood panel to 37” x 69” and cut 3” x 3 ½” notches out of each corner of this panel to fit around the legs of the workbench.
Place this panel onto the drawer framing of the workbench.
NOTE: You may have to remove one of the top pieces of 2×4 framing in order to get this panel in. Simply remove the pocket hole screws, place the panel in and screw the 2×4 back in place.

Step 13: Add Top Panel
Cut a piece of ¾” plywood to 38” x 71” and center on the top of the workbench. Secure from the top using 1 ¼” wood screws or use corner brackets on the bottom side to secure it to the 2×4 framing below.
Use MakeByMe to design and build the perfect project for your home.
Design your perfect project in 3D with MakeByMe
Try it in your virtual home using HomeByMe
Use MakeByMe plans to turn your design into a reality
Make unique furniture