How to Create a Floor Plan Design with Cutting-Edge 3D Technology

Create Floor Plans
Try it virtually and show it in 4K
Be sure everything is flawless
3D technology has transformed floor plan design by enhancing every aspect of the process, from creation to communication to collaboration. See how easy it is to implement and how much it can elevate your work as a creative professional.
In the dynamic world of architectural and interior design, staying ahead of the curve is essential for professionals seeking to excel in their craft.
The advent of 3D technology has opened up a realm of possibilities, revolutionizing the way floor plan designs are conceived, communicated, and brought to life.
With its remarkable capabilities and immersive features, 3D floor planners have become indispensable tools for designers, empowering them to unleash creativity and elevate their work. Users can visualize and explore spaces in remarkable detail, leaving no aspect of the design to chance.
Below, we explore how this powerful software is changing the game, and how easy it is to start implementing this tech to develop exquisite floor plan designs to keep clients and stakeholders happy.

How 3D Tech Can Elevate Your House Floor Plan Design
The days of erasing and redrawing floor plans are long gone. Today, they’ve been replaced by a seamless, digital 3D environment where changes can be made in an instant. This streamlined process saves valuable time and effort, allowing designers to focus their energies on crafting the most optimal and captivating house floor plan design. Here are a few of the main benefits that this advanced software can offer you:
Enhanced Visualization and Realism
Transform 2D floor plans into stunningly realistic 3D representations. By visualizing designs in three dimensions, designers gain a comprehensive understanding of spatial relationships, proportions, and scale. Realistic renderings also allow clients and stakeholders to envision the final outcome accurately, fostering better collaboration and decision-making.
Seamless Design Iteration and Adaptability
Easily modify and experiment with different design elements. Users can quickly adjust room layouts, furniture arrangements, and architectural features to explore various design possibilities. Iterative design processes become more streamlined, saving time and money compared to traditional methods.
Precise Measurement and Spatial Analysis
With accurate measurements, users can ensure precise spatial analysis and efficient use of space. Assess the feasibility of traffic flow and functional requirements before implementation. This level of precision helps minimize errors, maximize space efficiency, and optimize the overall user experience.
Lighting and Material Simulation
Simulate different lighting conditions and materials within the floor plan design. Experiment with natural and artificial lighting sources to achieve the desired ambiance and highlight architectural features. Material simulations aid in selecting appropriate textures, colors, and finishes too.
Virtual Reality Walkthroughs
Create immersive walkthrough experiences with virtual reality capabilities. VR enables clients to virtually explore the design, experiencing its spatial qualities and atmosphere firsthand. Designers can gather valuable feedback, make necessary adjustments, and ensure client satisfaction before initiating construction.
Enhanced Client Communication and Marketing
Photorealistic visualizations and virtual tours help to facilitate effective communication between designers and others, making it easier to convey ideas and concepts. Compelling 3D presentations also serve as powerful marketing tools, enabling designers to showcase their expertise and attract new clients.
3 Bedroom Floor Plan Example


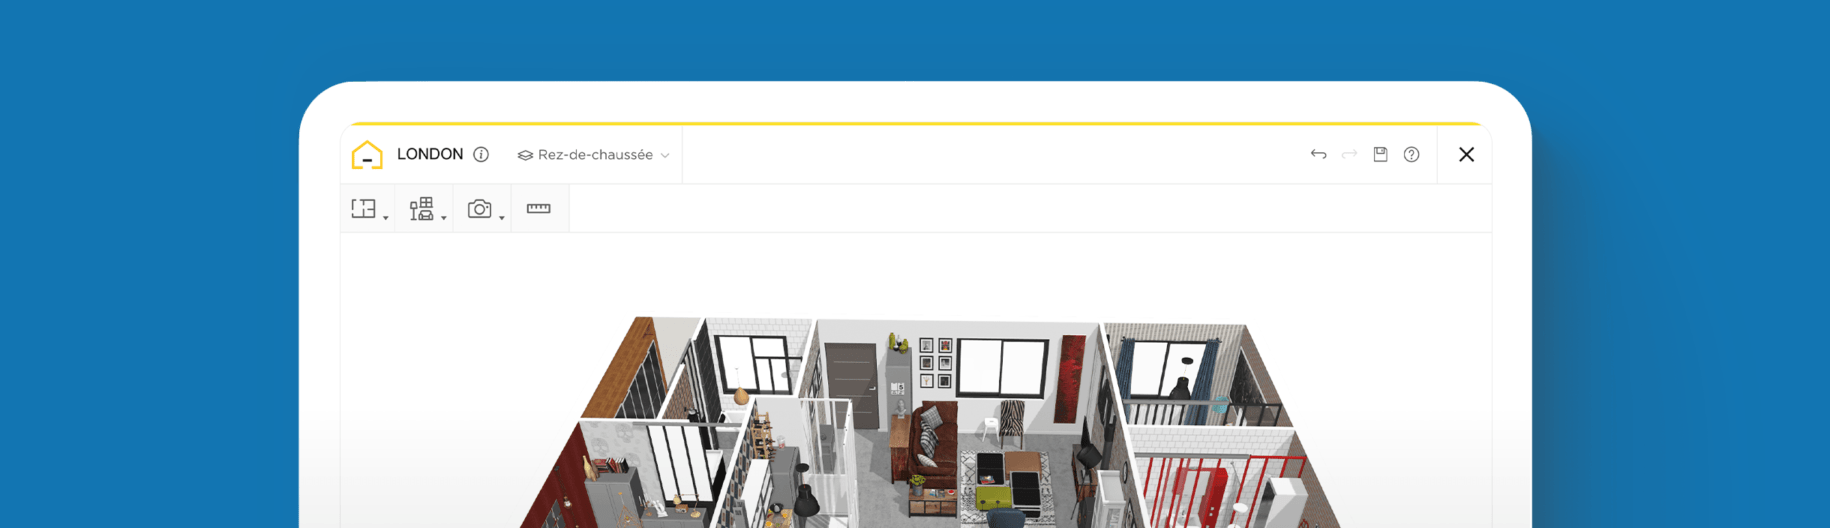
How to Use a 3D Floor Plan Designer
1 Set up your free account and name the project
Start your design journey by signing up for a free account, logging into the floor planner, and labeling your first project.
Then, select the type of housing and click to view the dashboard.
2 Use the menu options to select the “Add room” or “Add wall” feature
Once you’re in the HomeByMe interface, select from the options to “Add wall” or “Add room” to assemble the layout.
If you’re envisioning a floor plan with predefined rooms, opt for the “Add room” feature. For more flexibility and customization, select “Add wall” to draw liberally.
3 Click to connect each wall or adjust the size and shape of rooms
If using the “Add room” option, choose the shape and set the correct dimensions.
If you selected “Add wall,” click to create each segment of the wall and double-click to finish and validate it.
Use your cursor to connect the walls to form the desired layout.
4 Choose doors and windows from the catalog and place them in the floor plan
Next, it’s time to add more features. Click on “Products” in the toolbar and then “Build.”
This will bring you to a menu where you can select doors or window designs to choose from and add to the floor plan.
Click “Add to project” and use your cursor to position it. Follow the same process to add another door or window.
5 Navigate to the “Furnish” tab to fill in the details
To check out the floor plan from a more realistic viewpoint, click on the 3D option in the dashboard.
This will make it easier when adding in the design details.
To start adding in details, go to the “Furnish” button.
Choose the room you want to furnish and then select an item to add to the project, such as a sofa or coffee table.
Place your furniture in the desired location and visualize it in 3D.
Click to resize, reposition, duplicate, or customize it further.
6 Use the “Brand Corner” to find furniture, appliances, and decor
Select from brand name products, furniture, and appliances to assemble a design that reflects your vision.
Just click on the “Brand Corner” option in the drop-down menu to see all the top brand names available.
Click on any brand to explore the products and materials that can be applied to the floor plan.
Browse through the online catalog to find generic products too, and then drag and drop items into the floor plan to visualize the ideal space.
7 Try Autofurnish for fresh ideas to use in the design
Need some inspiration?
Try the Autofurnish feature to gain new ideas on how to best furnish and decorate the layout.
This is an excellent way to gain new perspectives and ideas when you’re feeling stuck on how to best utilize the space.
8 Elevate the floor plan design by choosing a background setting
Set the backdrop that’s most appropriate and accurate based on the actual home, room, or structure that you are designing.
This can elevate the presentation and foster a more accurate mood and vibe before sharing it with others.
9 Click on the Footprint tab to take a virtual tour of your work
On the bottom center of the dashboard, click on the footprint symbol next to the 3D tab.
Use this feature to navigate through the layout to gain a realistic idea of how it will look and feel in reality.
This is an excellent way to see it from an in-depth stance and analyze designs to determine what should stay or be modified.
10 Set the light temperature and share 360° views of the design
Before sharing, complete the scene by selecting the time of day to capture it in the best light.
Choose the right mood and light temperatures, such as golden hour or night for a more intimate ambiance.
Then try an immersive VR experience or send it to a client to experience it via their smartphone.
You can also capture realistic images to project yourself or a client in the space.
When you’re ready, save, export, and share your design as a 360° image, including on your favorite social media networks.

The benefits of 3D floor planners are numerous and impactful, ranging from enhanced visualization and realism to seamless design iteration and adaptability.
The precise measurement and spatial analysis capabilities ensure efficient use of space, while lighting and material simulations create impressive and immersive visual experiences.
By using a 3D floor plan designer like HomeByMe, designers easily harness the power of this technology and elevate their creative profession to new heights. Try it today for free!


Create Floor Plans
Try it virtually and show it in 4K
Be sure everything is flawless
Make flawless Design plans