A Step-by-Step Guide to Creating 3D Home Design in Minutes

Make any home designs quickly
Try it virtually and show it in 4K
Be sure everything is flawless
Dive into the world of 3D home design and unleash your creative potential with confidence and clarity in just a few simple steps.
The field of interior design is undergoing a major transformative shift with the integration of advanced 3D technology. For both aspiring and established professional interior designers, embracing this new frontier is crucial for staying at the forefront of the industry.
The good news is tapping into the limitless potential of 3D tech has never been easier. With user-friendly drag-and-drop tools and realistic products and materials, it provides all the resources needed to pitch ideas and truly tailor designs based on the unique needs of each person.
Homeowners or aspiring professionals can also utilize this software, taking advantage of it for learning purposes or to establish a certain look when remodeling at home.
Below, we show how to integrate this technology into design projects today, and how empowering it is for unlocking your creative prowess and capturing the attention of others with realistic 3D home designs.
3 Ways a 3D Home Designer Can Enhance Your Creative Skills & Success
In the interior design world, great aesthetics mean everything, and that comes down to not only the designs produced but also how they are conveyed to clients.
By leveraging the abilities of a 3D home designer, aspiring and established professionals can refine their creative eyes and design presentations, which can improve their chances of success in this competitive industry.
Here are just 3 examples of what this powerful 3D tech has to offer:
Customize Furniture Layout
Experiment with different furniture layouts to find the most optimal arrangement. Drag and drop furniture items into the floor plan, resize, and reposition them with a few clicks.
This flexibility enables designers to visualize various configurations and determine the best placement for each piece of furniture. They can assess factors such as foot traffic, functionality, and aesthetics to create a well-balanced and visually pleasing layout.
Explore Material and Color Combinations
Play with diverse materials and color combinations for surfaces, such as walls, floors, and countertops. Apply various textures, finishes, or stains to visualize how different textures and finishes work within the space.
This capability allows for easy comparison, liberal experimentation of ideas, and easier selection of materials that best align with the design objective.
Simulate Ambiance with Light Temperature
Lighting plays an integral part in great interior design, and 3D floor plans offer the ability to simulate different settings and lighting scenarios. Designers can try out natural and artificial lighting options, adjusting the intensity, color temperature, and direction of the light sources.
This makes it easier to see how certain lighting affects the overall atmosphere of the space. By simulating these details, making an informed decision about the placement and type of lighting required becomes effortless.

Create 3D Home Design Online for Free
Integrating 3D design software has never been easier, and it’s free to use. So, there’s zero risk involved and a host of benefits that can be utilized to advance your creative endeavors and career. Check out the guide below to begin.
Now, let’s delve into the simple process of how to create 3D home design online for free with a host of powerful tools and features at your fingertips.
Guide to Making Home Design 3D Renderings
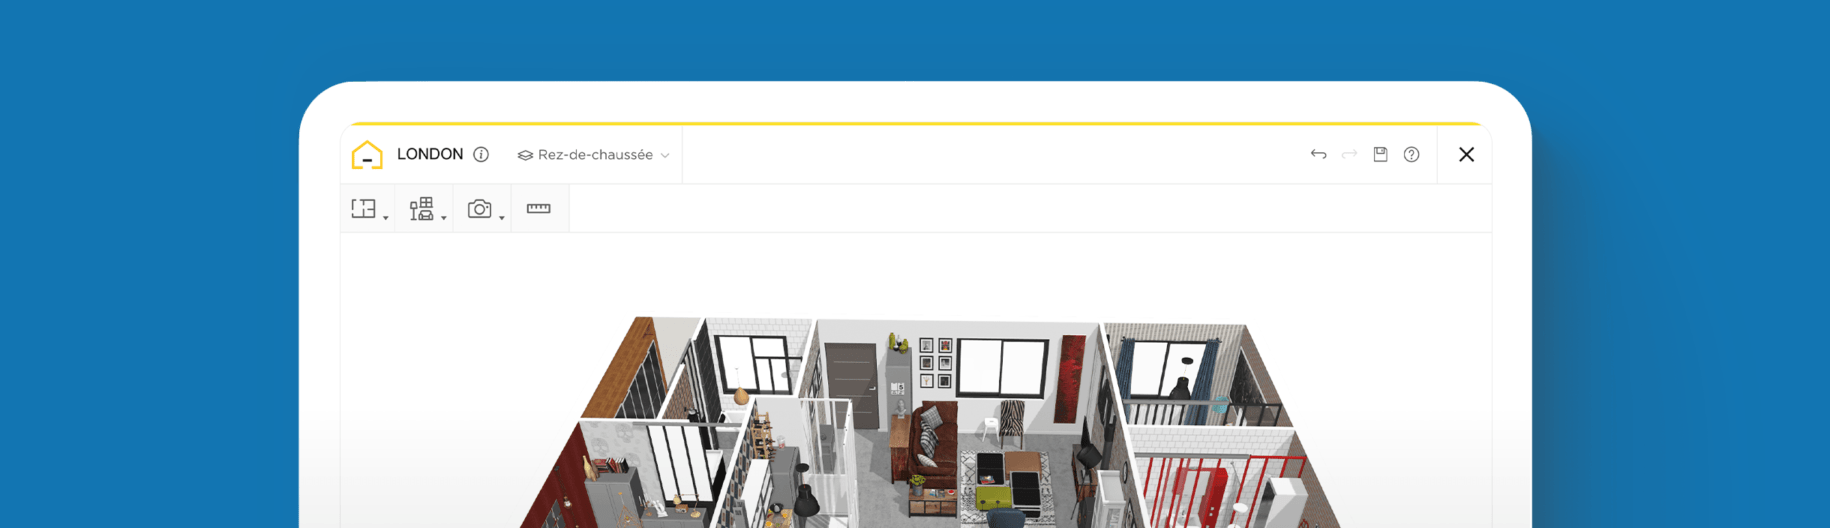
1 Launch your first project and define the layout
After signing into your free account, follow the steps that guide you in setting up the first project.
Once done, a grid-like platform will be launched, and you can begin defining the layout of the floor plan.
2 Create the floor plan by adding and defining the rooms and boundaries
Using the intuitive tools, specify the scope and shape of each room. In the 3D planner, go to the “Build” tab.
Click on “Add wall” if you wish to draw each interior and exterior wall, and connect them. To define the space based on rooms, click “Add room.” Add the dimensions for each wall or room shape.
HomeByMe provides tools to easily view, adjust, and resize the walls. Just click on any wall you want to change and move your cursor to reposition and edit it.
Add windows and doors and click to place them in various locations in the floor plan or explore new designs.
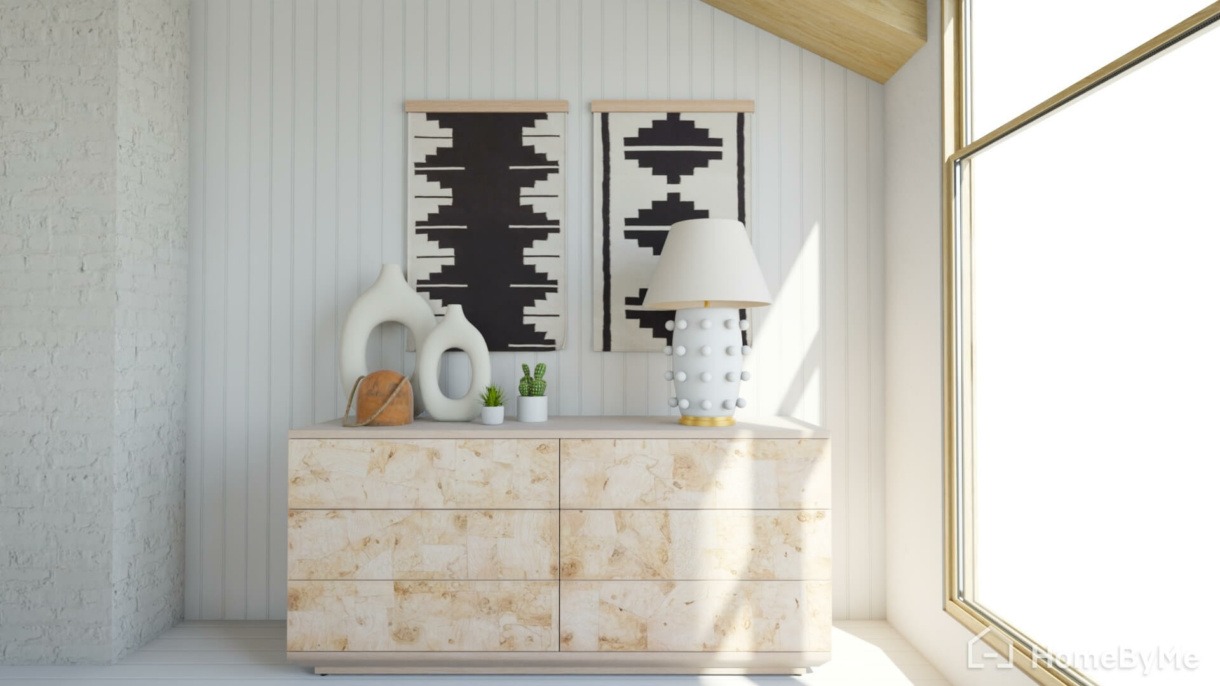
3 Navigate to the “Furnish” tab to access a wide range of furniture and decor items
When the space and layout have been defined, browse through the categories or use the search function in the 3D floor planner’s catalog to find the perfect pieces of furniture for the design.
Each furniture piece is accompanied by detailed information, including dimensions and materials, enabling you to make informed choices.
Simply drag and drop the selected furniture items into the desired rooms and reposition or resize them to create the best arrangement and layout.
4 Make modifications to furniture to create a personalized space
3D floor planners like HomeByMe give you the power to modify the properties of furnishings and decor.
Once added to the floor plan, right-click to see the options available for adjusting the color, texture, size, and more.
To quickly reuse an item in another section of the floor plan, copy and paste or click to duplicate.
5 Experiment with a variety of materials, such as wood, tile, stone, and paint
To further enhance the realism of your design, play around with diverse colors, finishes, and materials.
Whether it’s wood, stone, tile, wallpaper or paint colors, you can apply them to walls and other features to see how they impact the overall look and feel of the space.
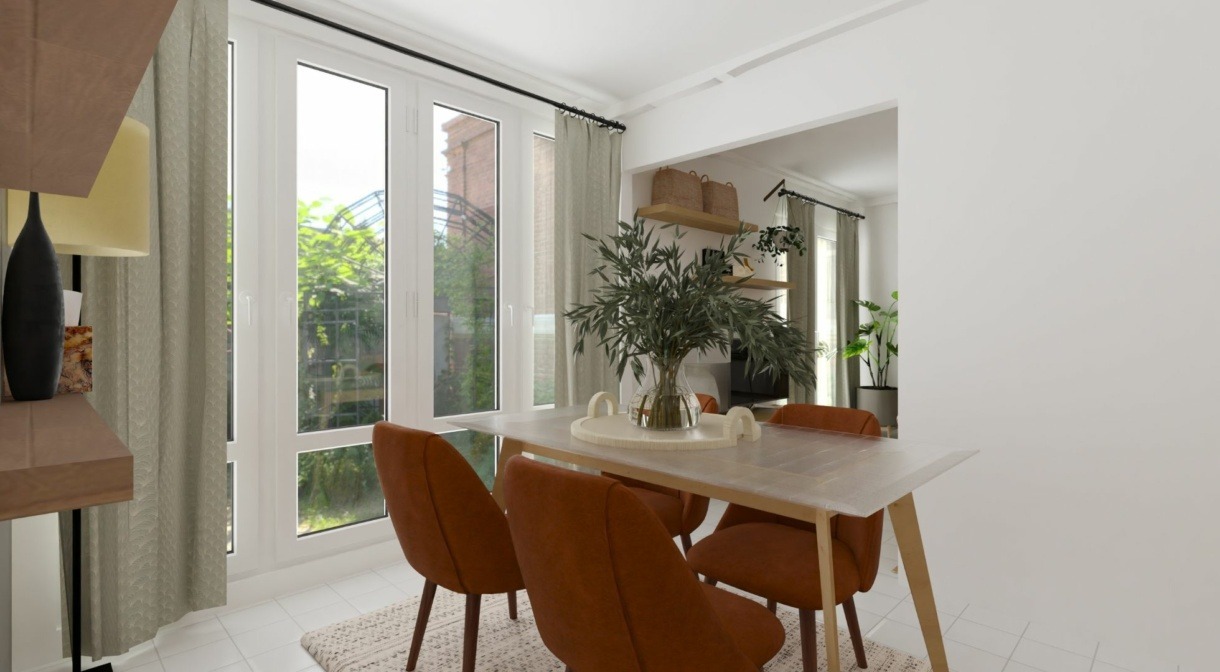
6 Explore different lighting options to create the perfect atmosphere
Incorporate lighting fixtures into your floor plan to establish the perfect atmosphere in the design. Choose from pendant lights, chandeliers, recessed lighting, floor lamps, and more.
Test out different placements and use them to highlight key areas of the space, such as artwork, bookcases, or a cozy reading nook.
7 Preview in 3D to get a better understanding of how the design will look and feel in reality
Once you have furnished, decorated, and added lighting to your floor plan, it’s time to take a virtual preview of it. HomeByMe offers realistic, virtual touring that lets you explore the design from a first-person lens.
To access this, go to the view mode options on the bottom center of the dashboard and click on the footprints. Then use your cursor to move through the space to evaluate and critique every aspect of your work.
8 Export so others can experience a virtual walkthrough and save HD images
You can generate HD pics, including 360° panoramic images so every inch can be explored in detail. To give clients an accurate idea of what to expect, export and share a virtual reality walkthrough.
This is an excellent way for any clients or collaborators to understand the full scope of the design and how it will appear in reality once initiated.
By following these simple steps, you can effectively create a 3D home design in no time. With tools like HomeByMe, designers and architects can tap into the unlimited potential for creating stunning designs, and seamlessly integrate this technology into their projects.
The ability to visualize and iterate with precision, collaborate effectively with clients, and showcase expertise through photorealistic presentations has truly elevated the design process to new heights.
Try it today and see how much this cutting-edge technology can help to unlock a world of possibilities in the realm of interior design.


Make any home designs quickly
Try it virtually and show it in 4K
Be sure everything is flawless
Make flawless Design plans